No se pudo cargar la disponibilidad de retiro
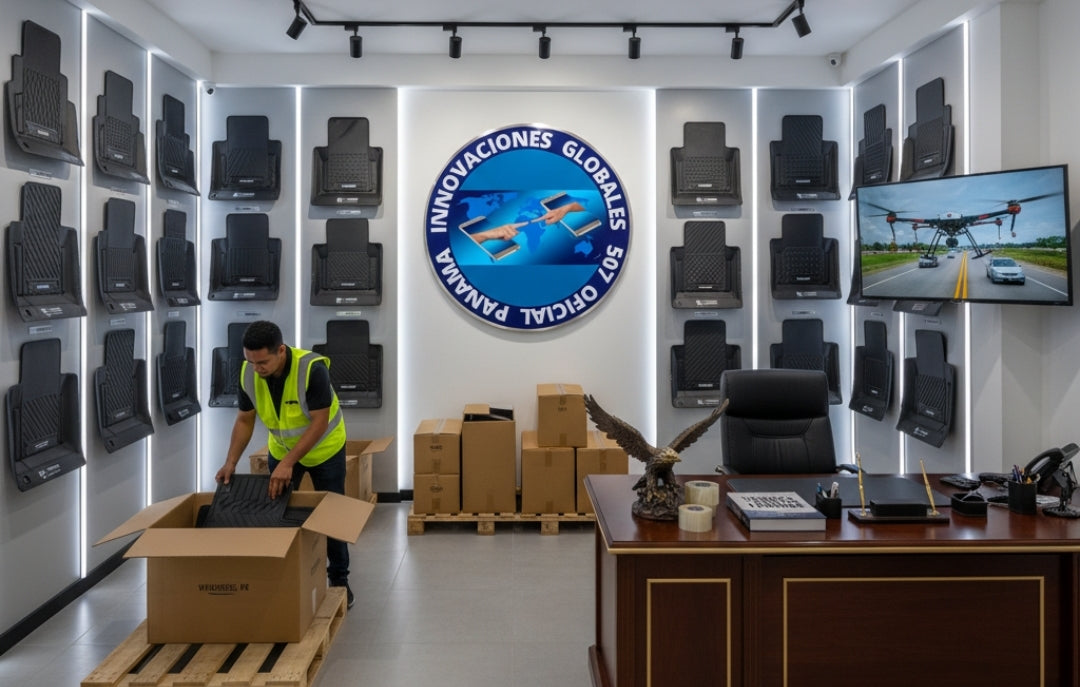
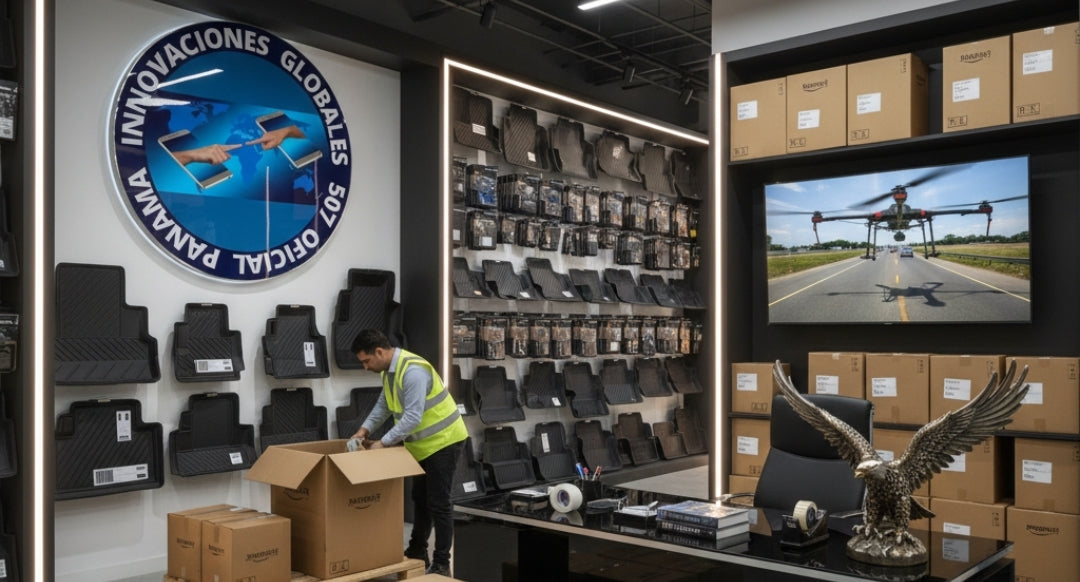
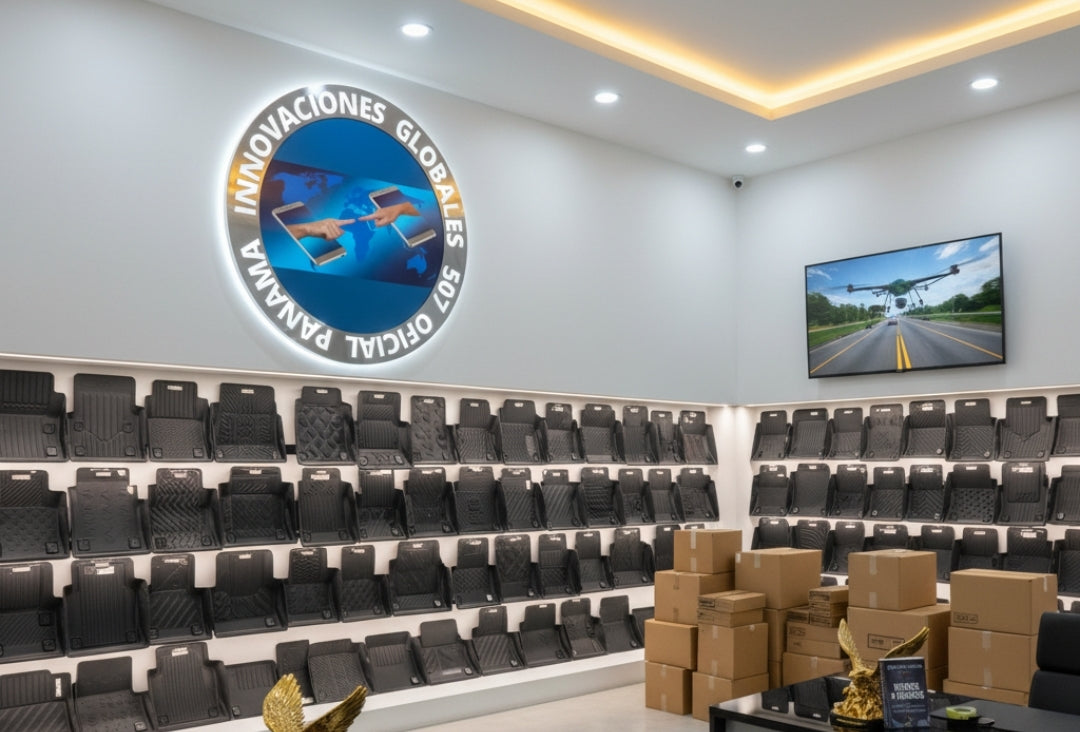
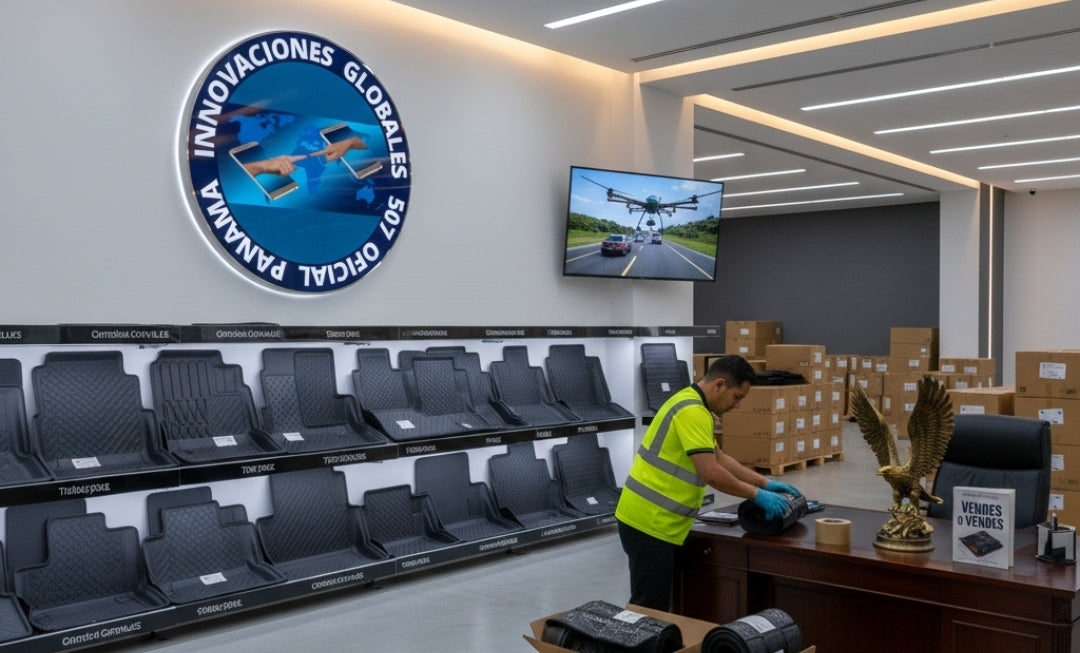
Innovaciones Globales
industrial overhaul and teaching Digital 1080P Microscope Camera
industrial overhaul and teaching Digital 1080P Microscope Camera
Product Name: Digital Microscope
Model No.: GS-ADSM106S
GS-ADSM106, It realized Full HD, high object distance, multifunction, multi-output at the same time. With help of the our measuring software, it can easily meet many different requirements in many industries, such as industrial overhaul and teaching demonstration. And it’s appearance design combines more ergonomic consideration, provides users better experience. We sincerely wish this product can release your eyes and improve your work quality. Thanks for your support.
This operation manual allows you to work safely with the digital Microscope. Please keep this manual for your information. Liability is void for any damage caused by not follow this manual.
Failure to follow the warnings and instructions may cause electric shock, fire and/or serious injury.
Not following this note can cause permanent damage to the device.
Storage and transport: Improper transport can harm the device; Always transport this device in the provided box in order to prevent damage.
Information on disposal: Electronic equipment does not belong to domestic waste, but must be disposed in accordance with the applicable statutory provisions.
In order to bring customers a better experience, we may change the product a little bit during perfecting it. The description in this instruction is for reference ONLY. Thanks for understanding.
Safety:
1.Keep the tool dry, clean, free from oil, water, gas or other materials capable of causing corrosion.
2.This appliance is not intended for use by people with limited physical, sensory or mental capabilities.
3.Keep bystanders, children away while operating the tool.
4.Do not overreach, keep proper footing and balance at all time.
Basic Parameters
| AD106S
|
AD106
|
|||
| Specification | Image sensor | High Quality HD Sensor | High Quality HD Sensor | |
| Video output | 1080 ;720 | 1080P (FHD) ;720P (HD) | ||
| Video format | AVI | AVI | ||
| Magnification | Up to 220 times (continuous) | Up to 220 times (continuous) | ||
| Photo resolution |
1080*720P - 4032*3024P | 1080*720P - 4032*3024P | ||
| Photo format | JPG | JPG | ||
| Focus range | 2cm to 10.5cm | 2cm to 10.5cm | ||
| Frame rate | Max 30f/s under 600 Lus Brightness | Max 30f/s under 600 Lus Brightness | ||
| Interface | USB 2.0 | USB 2.0 | ||
| Storage | Micro-SD card(NOT INCLUDED), up to 32G | Micro-SD card(NOT INCLUDED), up to 32G | ||
| PC support | Yes | Yes | ||
| Power source | 5V DC | 5V DC | ||
| Light source | 8 built-in LED& 2 LED with the stand | 8 built-in LED | ||
| Screen size | 4.3 inch | 4.3 inch | ||
| Stand size | 16*10*19.5cm | 16*10*19.5cm | ||
| Certification | CE/FCC/ROHS | CE/FCC/ROHS | ||
| Package contents | microscope×1 metal stand(with 2 spotlights)×1 instructions×1 USB cable×1 IR remote×1 UV filter×1 3M sticker×1 Switch cable×1 Power adapter×1 |
microscope×1 metal stand×1 instructions×1 USB cable×1 IR remote×1 UV filter×1 3M sticker×1 | ||
| Package data: | 28*21*8cm/1.13kg | 28*21*8cm/0.95kg | ||
| Warranty: | 1 year | 1 year | ||
| Term: | FOB Shenzhen | FOB Shenzhen | ||
Product Picture:


Connect & Outputs
So generally, it has 5 ways of output including it’s own monitor can show image itself. And the rest four are : HDMI,AV/TV, USB and memory card. The airscape in below shows the different ports on the device. In the next few chapters, there are more details about each of them.

1. AV output.(You need a separated AV cable to connect the device to the monitor, when you need to use AV output. There is no AV cable in the standard configuration)
2. Memory card. (In order to save video files and capture results)
3. USB output. (You need a separated USB cable to connect the device to the PC, when you need to use USB output)
4.HD output. (You need a separated HD cable to connect the device to the HD monitor, when you need to use HD output)
5.Connect the device to the switch.
6.Connect the switch to the power supply.
7.Connect the two goose lights to the switch.
8.The switch. It has three buttons. The one on the left is ON/OFF, to get or break the connection between the device and the power supply. The rest two are for the two goose lights. The middle one means “brightness up”, the right one means “brightness down”.
General Use
Use Individually
1. According to the instructions given by last chapters, connect the camera to the power supply like 5.6.7.
2. Press the “ON/OFF” button on the monitor. (Sometimes the camera will switch on automatically when it is connected to the power supply)
3. Turn on the LED lights, adjust the object distance wheel and the focus controller to get the image that you want.
4. Use the “UP/DOWN” to zoom in/out.
*To switch mode:
1. Press “M” shortly. (Or press the “Mode” on the remote)
2. Icons definition in different modes:
: standby mode;
: capture mode;
: record mode;
: image playback mode
: video playback mode (If the files are videos, press “OK” to play the video file)
: Lock the file which is being recording
*To set the menu for record mode:
1. Press “M” for few seconds until on the screen shows the menu. (Or press “MENU” on the remote.)
2. Press “UP/DOWN” and use “OK” to choose what to set.
3. Press “M” again when you are done.
* Frozen: Stop the image on the screen. It works at standby, record and capture modes.
* Zoom in&out: digital zooming in to 4 times.
* Brightness up&down: exposure compensation from + 2.0 to -2.0.
* Lock/unlock: to lock the file when it’s recording. So the video file which has been locked won’t be covered by new files when the memory card is full.
* Sharpness up&down: there are three levels of sharpness: Soft/Normal/Strong. Those two buttons are both used to switch the levels, but in different orders.
* Contrast up&down: same principle as Sharpness.
* Inverse: refer to pictures in below:
Normal Inverse


* Black&white: refer to pictures in below
Normal Black&White

HDMI
·First, make sure that the monitor connecting to the microscope is literally HD monitor. Otherwise it won’t perform as good as we expected.
·Second, connect the microscope to the HD monitor, also, connect it to the power supply. Because there is no built-in battery in the device, so make sure the microscope is always in charging when you use it.
·Third, turn on the microscope and adjust the distance. Then put the object on the table and adjust the focus controller.
·It won’t show anything on it’s own screen when it is connected to other equipments. So it’s normal that when you use it as HD output, the 5 inch screen keeps being dark.
·You still can take pictures and save them if you have a memory card inside the microscope. But you can’t record videos in this output mode.
FAQ
• Why is there no image on the monitor ?
Please check all the cables connect properly and also make sure the device is switched on.
• Why the image is not clear ?
Please adjust the object distance and the focus controller, check the direction of the LED lights, and
make sure the lens is clean enough.
• Remote doesn’t work ?
There is no battery inside of the remote as standard configuration. Please check if there is battery
in the remote.
• Why is there no image in playback model ?
Sometimes the video file is too big, the system needs time to process.
• SD card error
Make sure the memory card you use is certified and quality. Format the memory card in the system first,
then try again.
Need More information please contact us as below information freely
skype: sunnysxc
Wechat: goldsunny71
Email: sales @ goldstarelectr.com
Shipment Method: BY DHL, FEDEX, UPS, DHL, CHINA SMALLER PARCEL ETC.
Materials
Materials
Shipping & Returns
Shipping & Returns
Dimensions
Dimensions
Care Instructions
Care Instructions


-
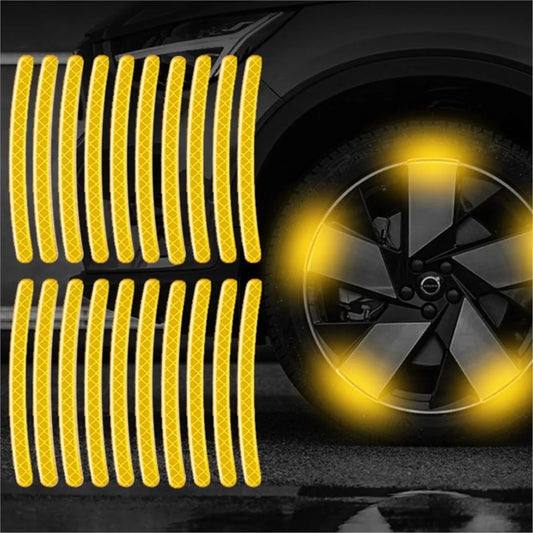
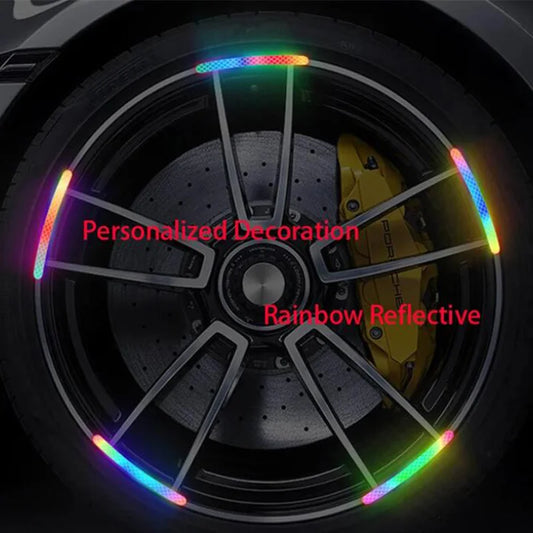
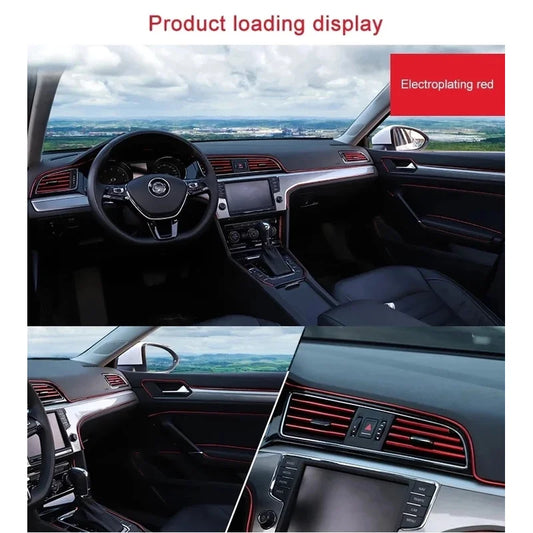
20pcs Car Wheel Hub Reflective Sticker Tire Rim Reflective Strips Luminous for Night Driving Car Bike Motorcycle Wheel Sticker
Proveedor:Innovacion globalesPrecio habitual A partir de $0.70 USDPrecio habitualPrecio unitario por$0.70 USDPrecio de oferta A partir de $0.70 USD -
For Car Motorcycle, Bicycle Wheels, Seven-Color Laser Car Decoration Accessories Anti-Collision Reflective Warning Stickers
Proveedor:Innovacion globalesPrecio habitual $0.88 USDPrecio habitualPrecio unitario por$0.88 USDPrecio de oferta $0.88 USD -
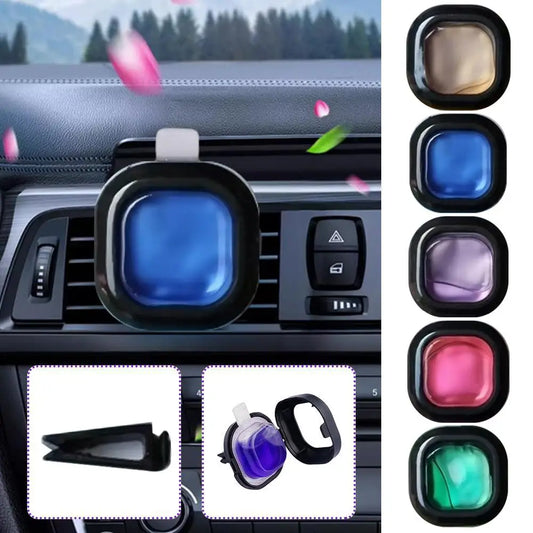
Sage/Jasmine/Lavender/Peach/Orange Car Aromatherapy Fresh Air Eliminates Odor Lasting Fragrance Car Air Outlet Aromatherapy Clip
Proveedor:Innovacion globalesPrecio habitual $1.06 USDPrecio habitualPrecio unitario por$1.06 USDPrecio de oferta $1.06 USD -
Xiaomi 2025 New! 2-in-1 Mini Wireless Adapter Seamlessly Enable Carplay & Android Auto Plug & Play For Most Vehicle Models
Proveedor:Innovacion globalesPrecio habitual A partir de $1.15 USDPrecio habitualPrecio unitario por$1.15 USDPrecio de oferta A partir de $1.15 USD -
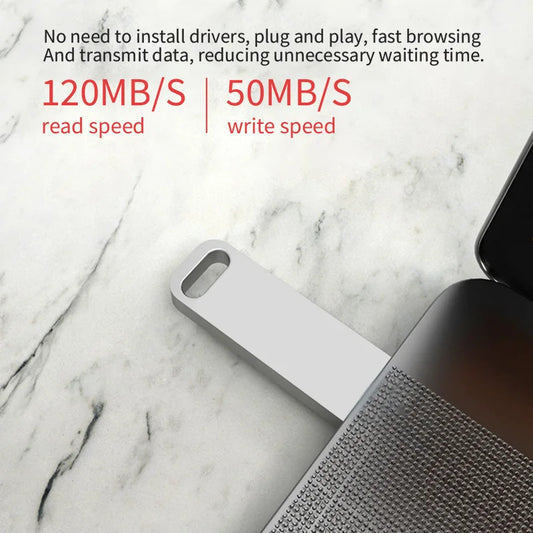
Xiaomi USB 3.2 2TB Flash Drive High Speed Metal U Disk TypeC Memory Stick Waterproof SSD Storage PC Phone Data Transfer Portable
Proveedor:Innovacion globalesPrecio habitual A partir de $1.50 USDPrecio habitualPrecio unitario por$1.50 USDPrecio de oferta A partir de $1.50 USD -
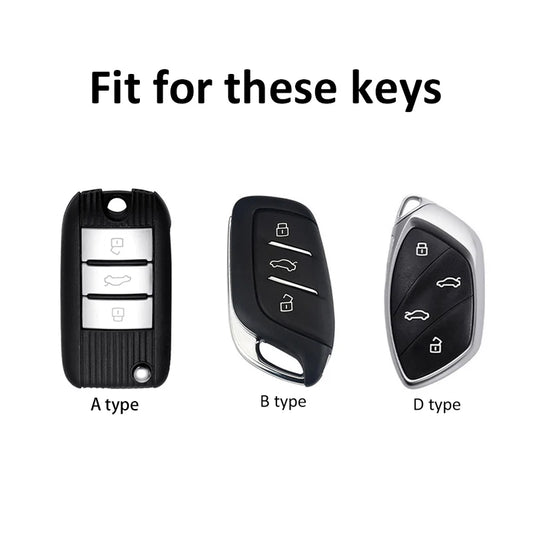
For MG6 EZS HS EHS MARVEL X MARVEL R Electric Roewe RX5 I6 I5 RX3 RX8 ERX5 MG ZS EV 2021 Soft TPU Car Key Case Cover Keychain
Proveedor:Innovacion globalesPrecio habitual A partir de $1.86 USDPrecio habitualPrecio unitario por$1.86 USDPrecio de oferta A partir de $1.86 USD -
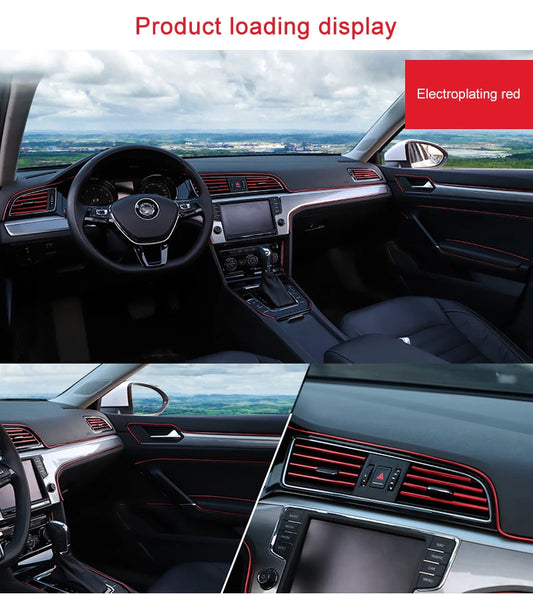
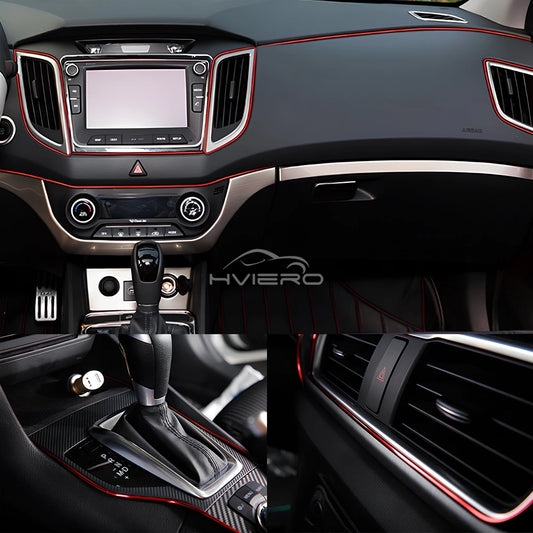
Car Moulding Decoration Flexible Strips1/3/5M Interior Auto Mouldings Car Cover Trim Dashboard Door Edgein Car-styling Universal
Proveedor:Innovacion globalesPrecio habitual A partir de $2.11 USDPrecio habitualPrecio unitario por$2.11 USDPrecio de oferta A partir de $2.11 USD -
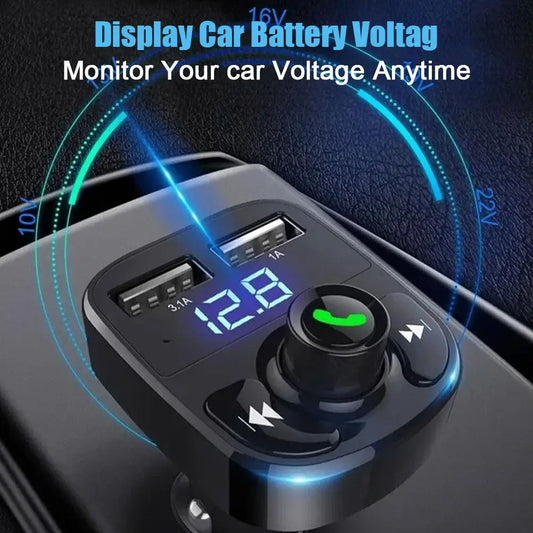
Bluetooth 5.0 Car Dual USB Fast Charger FM Transmitter Bluetooth Handsfree Car Kit Audio Modulator MP3 Player Audio Receiver
Proveedor:Innovacion globalesPrecio habitual $2.54 USDPrecio habitualPrecio unitario por$2.54 USDPrecio de oferta $2.54 USD -
Car Universal Trims Strip 5M Tape Interior Modelling Line Flexible Wheel Modified Center Control Instrument Panel Chrome Glitter
Proveedor:Innovacion globalesPrecio habitual A partir de $2.80 USDPrecio habitualPrecio unitario por$2.80 USDPrecio de oferta A partir de $2.80 USD -
Riding Bell Angel Guardians Biker Riding Bell Portable Motorcycle Accessories For Biker Riders Motorcycle Bicycle Valentine Gift
Proveedor:Innovacion globalesPrecio habitual $2.85 USDPrecio habitualPrecio unitario por$2.85 USDPrecio de oferta $2.85 USD -
Car Camera Rain Cover Anti-Rain Cover for Reversing Camera Easy Installation Protector Guard for Rainy Weather Daily Driving
Proveedor:Innovacion globalesPrecio habitual A partir de $2.87 USDPrecio habitualPrecio unitario por$2.87 USDPrecio de oferta A partir de $2.87 USD -
1-5pcs Universal Car Moulding Decoration Flexible Strips 5M Interior Auto Mouldings Car Cover Trim Dashboard Door Car-styling
Proveedor:Innovacion globalesPrecio habitual A partir de $2.88 USDPrecio habitualPrecio unitario por$2.88 USDPrecio de oferta A partir de $2.88 USD


Preguntar al consultor de IA

Adquiere tu Membresia Gratis y obten grandes beneficios
Casillero comercial en Estados Unidos
Tramites de Aduana
Logistica inversa
Transporte aereo & maritimo
Envios a domicilo
Membresia Gratis
Garantia de compras
Rastreo de Compras
Facilidades de pago
Manejo de las cotizaciones
Servicio Profesional
Disponibilidad 24 horas


-
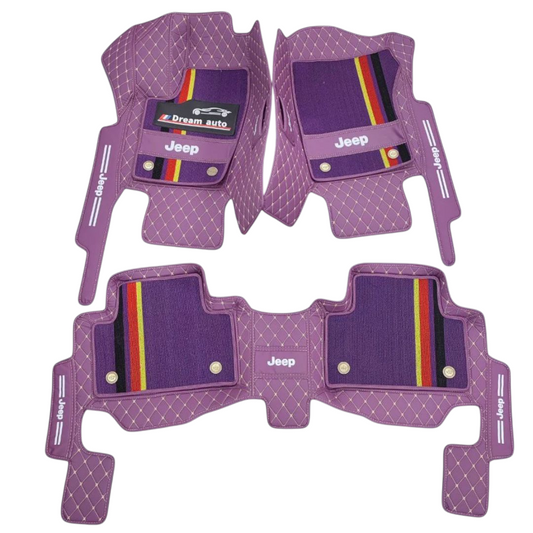
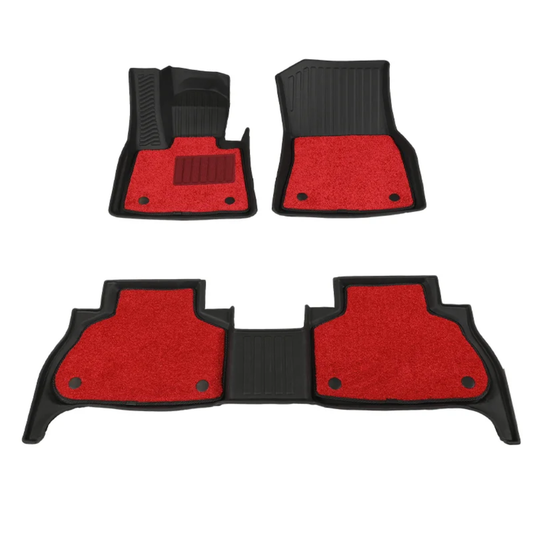
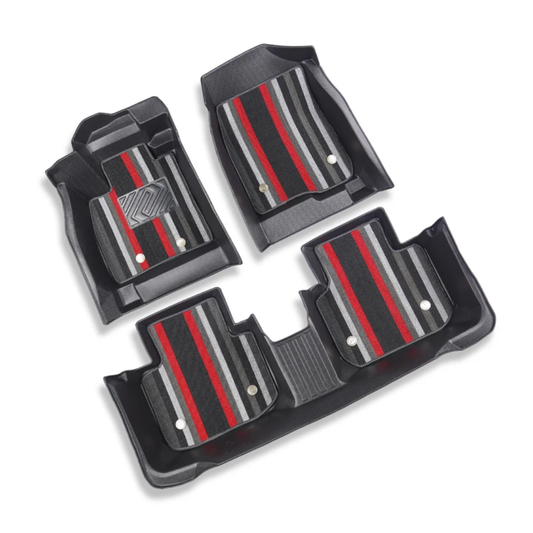
Set Fundas y alfombras Accesorios. para todo tipo de autos (Poliester universal) SET COMPLETO ADELANTE Y ATRAS Los mas vendido del mes
Proveedor:Innovaciones GlobalesPrecio habitual $60.00 USDPrecio habitualPrecio unitario por$120.00 USDPrecio de oferta $60.00 USDENVÍO GRATIS🎁 -
Set Fundas y alfombras Accesorios. para todo tipo de autos (Poliester universal) SET COMPLETO ADELANTE Y ATRAS Los mas vendido del mes
Proveedor:Innovaciones GlobalesPrecio habitual $60.00 USDPrecio habitualPrecio unitario por$120.00 USDPrecio de oferta $60.00 USDENVÍO GRATIS🎁 -
Set Fundas y alfombras Accesorios. para todo tipo de autos (Poliester universal) SET COMPLETO ADELANTE Y ATRAS Los mas vendido del mes
Proveedor:Innovaciones GlobalesPrecio habitual $60.00 USDPrecio habitualPrecio unitario por$120.00 USDPrecio de oferta $60.00 USDENVÍO GRATIS🎁 -
Set Fundas y alfombras Accesorios. para todo tipo de autos (Poliester universal) SET COMPLETO ADELANTE Y ATRAS Los mas vendido del mes
Proveedor:Innovaciones GlobalesPrecio habitual $60.00 USDPrecio habitualPrecio unitario por$120.00 USDPrecio de oferta $60.00 USDENVÍO GRATIS🎁 -
Set Fundas y alfombras Accesorios. para todo tipo de autos (Poliester universal) SET COMPLETO ADELANTE Y ATRAS Los mas vendido del mes
Proveedor:Innovaciones GlobalesPrecio habitual $60.00 USDPrecio habitualPrecio unitario por$120.00 USDPrecio de oferta $60.00 USDENVÍO GRATIS🎁 -
Set Fundas y alfombras Accesorios. para todo tipo de autos (Poliester universal) SET COMPLETO ADELANTE Y ATRAS Los mas vendido del mes
Proveedor:Innovaciones GlobalesPrecio habitual $60.00 USDPrecio habitualPrecio unitario por$120.00 USDPrecio de oferta $60.00 USDENVÍO GRATIS🎁 -
Set Fundas y alfombras Accesorios. para todo tipo de autos (Poliester universal) SET COMPLETO ADELANTE Y ATRAS Los mas vendido del mes
Proveedor:Innovaciones GlobalesPrecio habitual $60.00 USDPrecio habitualPrecio unitario por$120.00 USDPrecio de oferta $60.00 USDENVÍO GRATIS🎁 -
Set Fundas Accesorios. para todo tipo de autos (Poliester universal) SET COMPLETO ADELANTE Y ATRAS Los mas vendido del mes
Proveedor:Innovaciones GlobalesPrecio habitual $70.00 USDPrecio habitualPrecio unitario por -
Set Fundas y alfombras Accesorios. para todo tipo de autos (Poliester universal) SET COMPLETO ADELANTE Y ATRAS Los mas vendido del mes
Proveedor:Innovaciones GlobalesPrecio habitual $60.00 USDPrecio habitualPrecio unitario por$120.00 USDPrecio de oferta $60.00 USDENVÍO GRATIS🎁


-
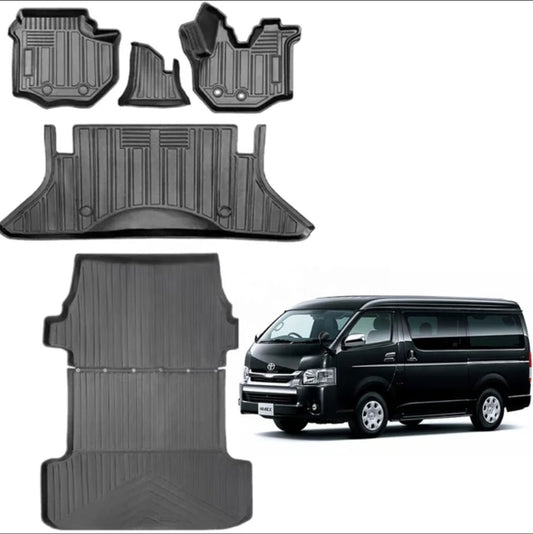
TPE Alfombras TERMOPLÁSTIC ELASTOMER Personalizadas TPE A Medida Exacta de tu Automóvil 11 a 15 Pasajeros 3 Filas Alfombras TPE + Alfombras de Maletero o Cajuela 💠OFERTA ESPECIAL SOLO AUTOMÓVILES DESDE EL AÑO 1950 HASTA EL AÑO 2000💠
Proveedor:Innovaciones GlobalesPrecio habitual $290.00 USDPrecio habitualPrecio unitario por$490.00 USDPrecio de oferta $290.00 USDENVÍO GRATIS🎁 -
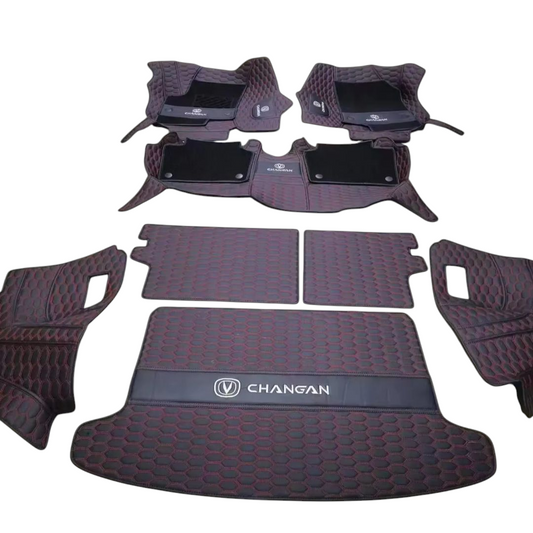
Alfombras Impermeables Dobles Hechas con cuero ecológico artificial ala medida exacta de cada automóvil 3 Filas de Alfombras 7 a 9 Asientos del Automóvil ( + ALFOMBRAS DE MALETERO O CAJUELA )
Proveedor:Innovaciones GlobalesPrecio habitual $290.00 USDPrecio habitualPrecio unitario por$350.00 USDPrecio de oferta $290.00 USDENVÍO GRATIS🎁 -
Alfombras Impermeables Dobles Hechas con cuero ecológico artificial ala medida exacta de cada automóvil 3 Filas de Alfombras 7 a 9 Asientos del Automóvil ( NO INCLUYE ALFOMBRAS DE MALETERO O CAJUELA )
Proveedor:Innovaciones GlobalesPrecio habitual $250.00 USDPrecio habitualPrecio unitario por$350.00 USDPrecio de oferta $250.00 USDENVÍO GRATIS🎁 -
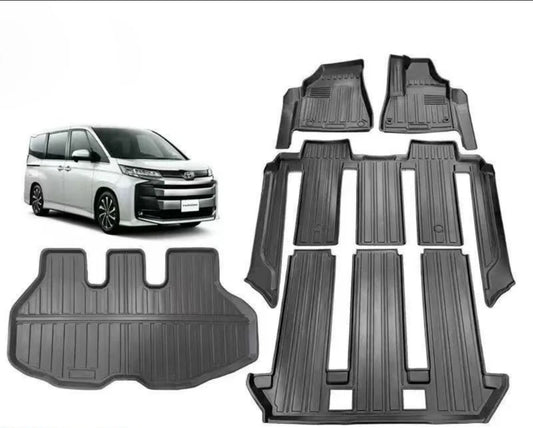
TPE Alfombras TERMOPLÁSTIC ELASTOMER Personalizadas TPE A Medida Exacta de tu Automóvil 11 a 15 Pasajeros 3 Filas Alfombras TPE + Alfombras de Maletero o Cajuela
Proveedor:Innovaciones GlobalesPrecio habitual $390.00 USDPrecio habitualPrecio unitario por$490.00 USDPrecio de oferta $390.00 USDENVÍO GRATIS🎁 -
Alfombras Impermeables Dobles Hechas con cuero ecológico artificial ala medida exacta de cada automóvil 2 Filas de Alfombras 2 a 5 Asientos del Automóvil ( NO INCLUYE ALFOMBRAS DE MALETERO O CAJUELA )
Proveedor:Innovaciones GlobalesPrecio habitual $180.00 USDPrecio habitualPrecio unitario por$290.00 USDPrecio de oferta $180.00 USDENVÍO GRATIS🎁 -
Alfombras Impermeables Dobles Hechas con cuero ecológico artificial ala medida exacta de cada automóvil 2 Filas de Alfombras 2 a 5 Asientos del Automóvil + ALFOMBRAS DE MALETERO O CAJUELA
Proveedor:Innovaciones GlobalesPrecio habitual $230.00 USDPrecio habitualPrecio unitario por$290.00 USDPrecio de oferta $230.00 USDENVÍO GRATIS🎁 -
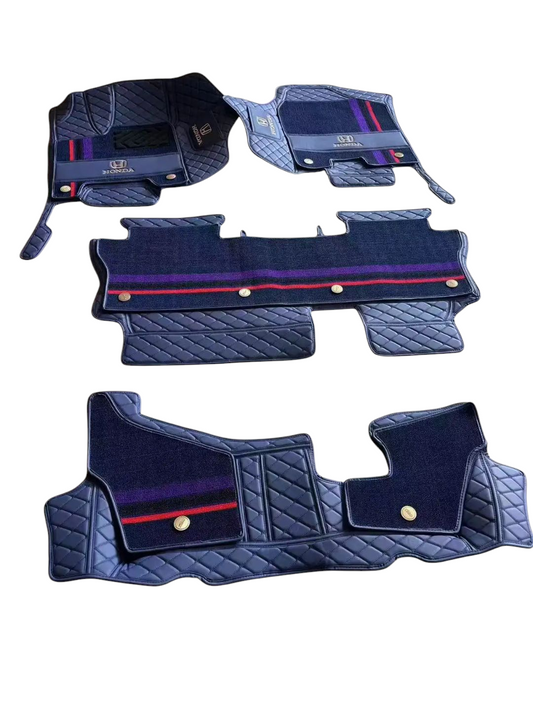
TPE Alfombras DOBLES TERMOPLÁSTIC ELASTOMER Personalizadas TPE A Medida Exacta de tu Automóvil 2 a 5 PASAJEROS 2 Filas Alfombras TPE + Alfombras de Maletero o Cajuela
Proveedor:Innovaciones GlobalesPrecio habitual $350.00 USDPrecio habitualPrecio unitario por$390.00 USDPrecio de oferta $350.00 USDENVÍO GRATIS🎁 -
TPE Alfombras DOBLES TERMOPLÁSTIC ELASTOMER Personalizadas TPE A Medida Exacta de tu Automóvil 7 a 9 Pasajeros 3 Filas Alfombras TPE + Alfombras de Maletero o Cajuela
Proveedor:Innovaciones GlobalesPrecio habitual $390.00 USDPrecio habitualPrecio unitario por$490.00 USDPrecio de oferta $390.00 USDENVÍO GRATIS🎁 -
TPE Alfombras DOBLES TERMOPLÁSTIC ELASTOMER Personalizadas TPE A Medida Exacta de tu Automóvil 7 a 9 Pasajeros 3 Filas Alfombras TPE (NO Incluye Alfombras de Maletero o Cajuela)
Proveedor:Innovaciones GlobalesPrecio habitual $350.00 USDPrecio habitualPrecio unitario por$490.00 USDPrecio de oferta $350.00 USDENVÍO GRATIS🎁 -
TPE Alfombras DOBLES TERMOPLÁSTIC ELASTOMER Personalizadas TPE A Medida Exacta de tu Automóvil 2 a 5 PASAJEROS 2 Filas Alfombras TPE ( NO Incluye Alfombras de Maletero o Cajuela )
Proveedor:Innovaciones GlobalesPrecio habitual $290.00 USDPrecio habitualPrecio unitario por$390.00 USDPrecio de oferta $290.00 USDENVÍO GRATIS🎁 -
TPE Alfombras TERMOPLÁSTIC ELASTOMER Personalizadas TPE A Medida Exacta de tu Automóvil 2 a 5 PASAJEROS 2 Filas de Alfombras TPE( No Incluye Alfombras de Maletero o Cajuela )
Proveedor:Innovaciones GlobalesPrecio habitual $180.00 USDPrecio habitualPrecio unitario por$250.00 USDPrecio de oferta $180.00 USDENVÍO GRATIS🎁 -
TPE Alfombras TERMOPLÁSTIC ELASTOMER Personalizadas TPE A Medida Exacta de tu Automóvil 2 a 5 PASAJEROS 2 Filas Alfombras TPE (NO INCLUYE Alfombras de Maletero o CAJUELA) 💠OFERTA ESPECIAL SOLO AUTOMÓVILES DESDE EL AÑO 1950 HASTA EL AÑO 2000💠
Proveedor:Innovaciones GlobalesPrecio habitual $130.00 USDPrecio habitualPrecio unitario por$180.00 USDPrecio de oferta $130.00 USDENVÍO GRATIS🎁